This blogpost is to help you with the zipper installation of this section of the wallet.
It is very similar to the pictures in the pattern, except there are no zipper ends sticking out. We have shortened them. This method reduces bulk in the side seams, which would have given your sewing machine problems.
 |
Lay your prepared 7 inch zipper, with the zipper pull facing up,
along the edge of your 8 x 4 piece leaving
about half an inch on each side.
Stitch a little less than a quarter inch using your zipper foot. |
 |
Matching the 8" sides, place the 8 x 7.5" piece, right sides together,
over the line of stitching you just did.
Pin. Flip over so you can see the first line of stitching. |
 |
From this side, and still using your zipper foot,
stitch a second line of stitching just inside the first line of stitching.
See where the lead of my pencil is pointed, or where my finger nail is pointed, |
 |
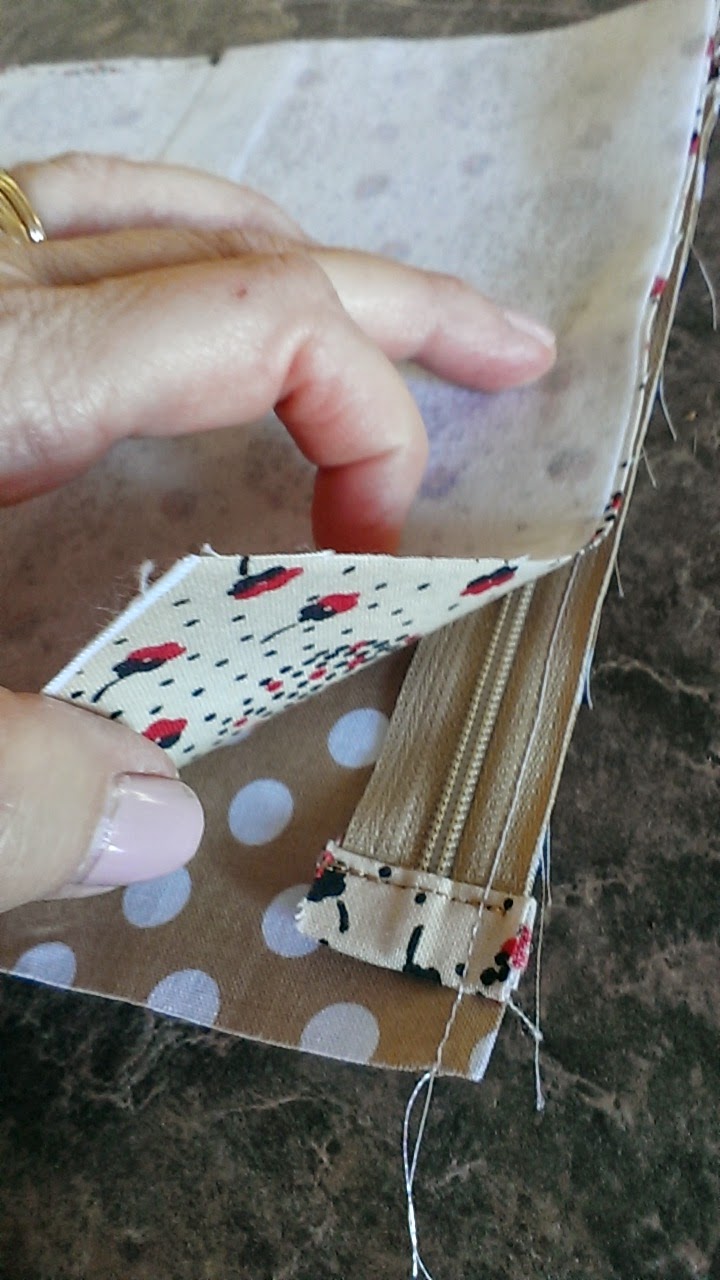
Now fold back the large piece and the small piece, and notice the side
of the zipper is now enclosed. Press into this folded back position..
(You will top stitch after both sides are done.)
Repeat the same on the other side of the zipper ensuring that you start with
the 8 x 4 piece, and the zipper tab is facing up!
After both sides are done, top stitch on both sides of the zipper. |
Open the zipper before going on to the next step!!!
 |
Fold both sides together so that the top edge bits are even. Place a pin to hold the sides even.
About one inch down, Take a one quarter inch clip through all four layers.
Repeat on other side. |
 |
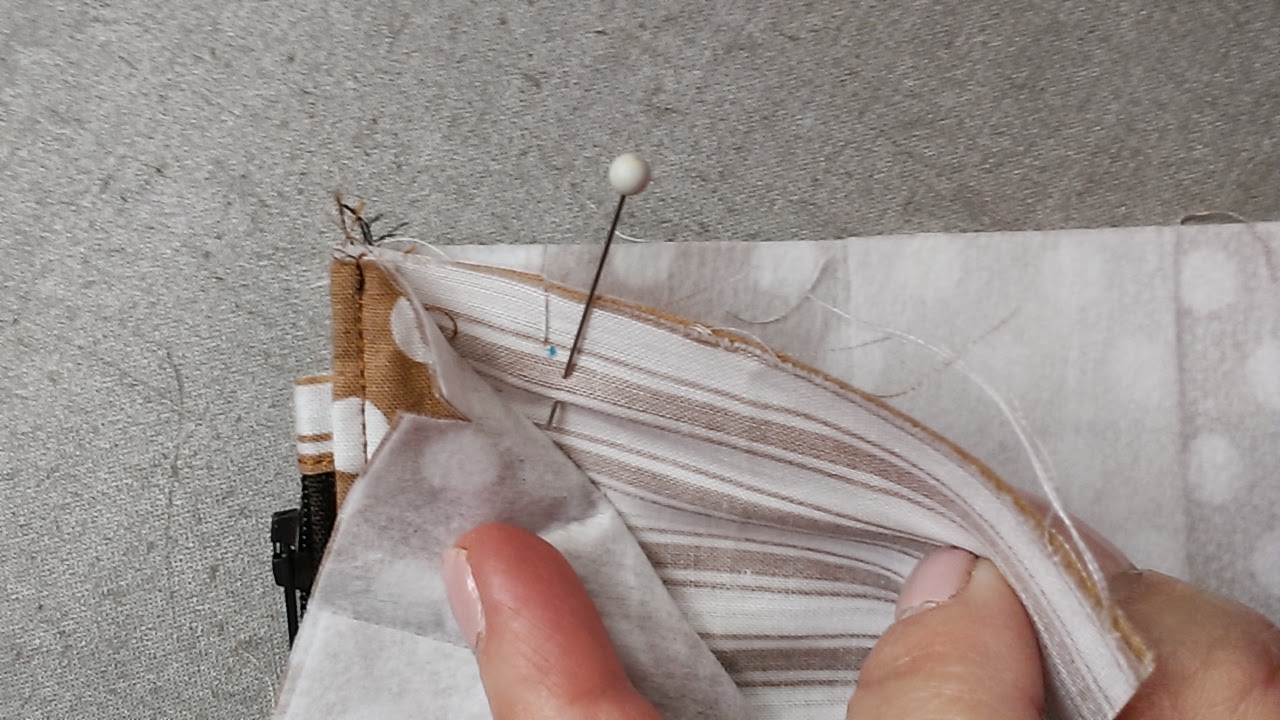
Starting on one side, lift away the longer sides to reveal the two shorter pieces inside.
Match the clips exactly on the two inner pieces and and pin. |
 |
Fold back the larger pieces and match the clips exactly, and pin.
Repeat on the other side. You should now four pins in your piece.. two on each side. |
 |
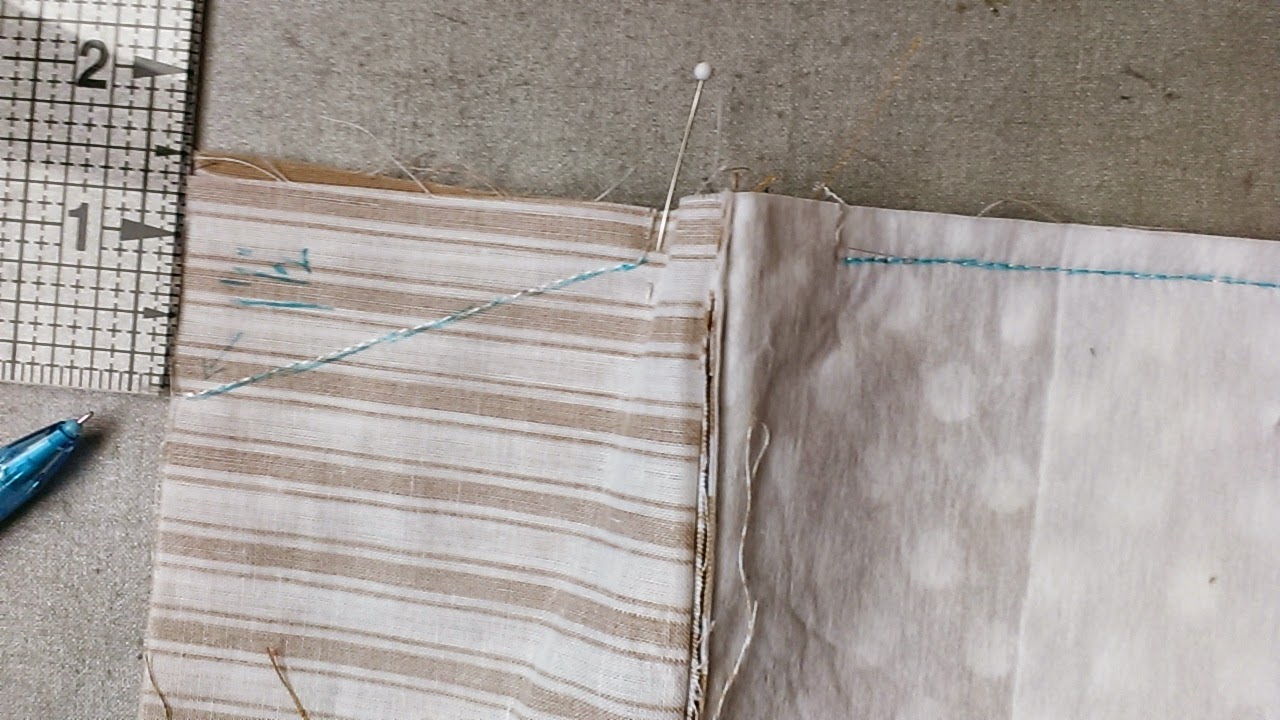
It's time to sew. I've drawn the sewing line in blue
Start at the top of the shorter piece. Take a diagonal seam starting in about 1.5".
Stitch to the first clip. Actually stop short of the clip by one stitch...(see my blue line.)
Then, lift your presser foot and move over the bumpy seams to the next pin
(pin is not shown in this picture) Resume stitching starting about one stitch past the clip. Stitch
a regular quarter inch seam around the three sides stopping one stitch before the pin
on the other side. Again, lift the presser foot over the bumpy seam and start stitching one stitch past
the clip. Stitch the diagonal line which mirrors the starting seam. |
 |
Clip away the excess on the two diagonal seams to 1/4". Clip the bulk
away from the two square corners.
Turn through the bottom of the shorter pieces and zipper.
Poke out the T-shirt arms... and stitch to flatten out.
If the extended part is much bigger than a quarter inch, trim to a quarter inch.
These raw edges will be hidden in the final seams on the side. |
 |
Top stitch the other end of this zipper piece. It will be the divider end.
Now continue on with the pattern directions to mark the center of this piece
and lay into final position. |


No comments:
Post a Comment